
The neck on this vintage Hofner Colorama II is going to get tackled before we deal with the guitar's other issues. The neck is in quite a state, with at least the following problems:
1. The frets need replacing (total refret).
2. The fingerboard is very uneven and needs re-radiusing (sanding down to the correct curvature again).
3. There is a long crack/gap running along the fingerboard that will need to be filled in (luckily this is not a structural problem).
4. The nut needs to be removed and replaced.
5. The old lacquer needs to be removed and the neck needs to be re-lacquered.
6. A new waterslide-decal logo needs to be made and applied.
7. The relief on the neck needs to be dealt with (it is back-bowed, even when the truss rod is completely loosened).
Today we will just deal with the stripping down stage.
First thing to do is remove the neck from the guitar as follows:

The machine heads (tuners) and string retainer are also removed, leaving us with this:

Before we can do any more work, the neck needs to be supported or clamped down in some way, so a quick neck rig is made from a piece of wood and a screw is passed from the back of that into one of the holes at the heel of the neck. A second screw passes through one of the machine head holes to hold the neck firmly (this can be removed, or moved to another hole, when doing any delicate work in that area).

STOP! Before continuing today’s post, if you ever decide to tackle a project like this, I cannot stress this enough…. WEAR SAFETY GLASSES. And for the sanding part and lacquer removal part, WEAR A MASK. You don’t want to be breathing that stuff into your lungs. You have been warned.
The nut is tapped out from the side using a hammer and some sort of straight punch. This one appears to have had a shim below it. With the shim removed it is clear that the nut slot will need to be cleaned out and leveled a little bit before a new one is installed.

Nut slot in need of work:
Filing out the nut slot:

A small pair of end cutting pliers are used to SLOWLY AND CAREFULLY remove the frets. Patience is a virtue at this stage. Any rushed movement will surely pull up a chunk of fretboard material by accident.

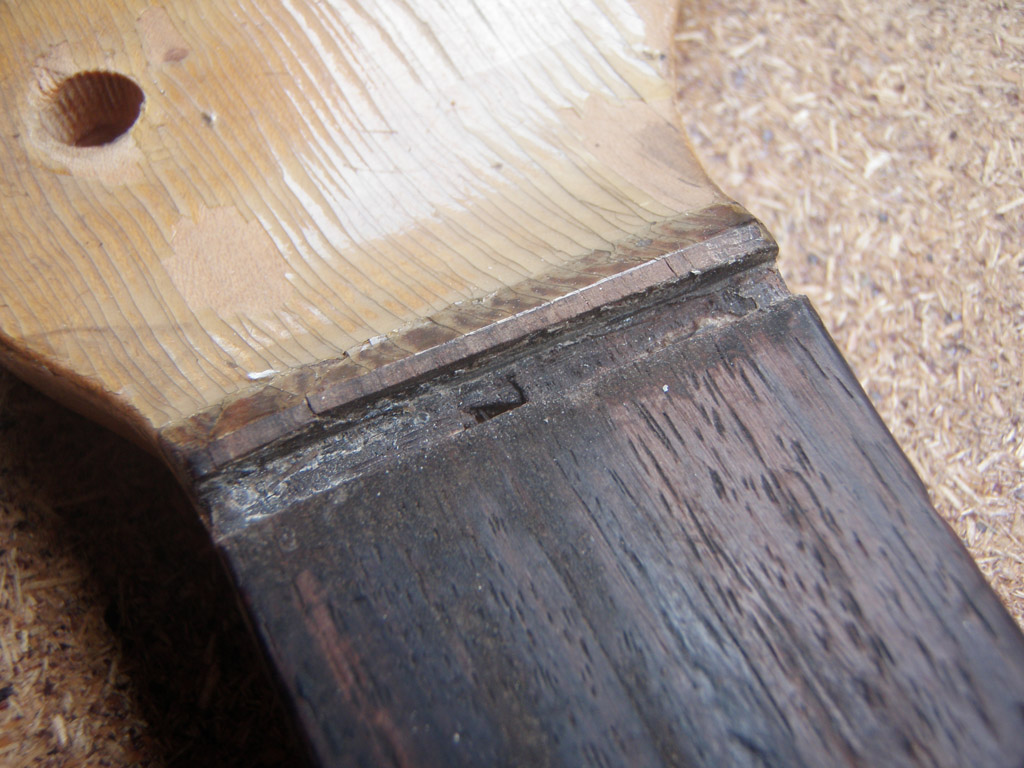
Once all of the frets have been removed, the fretboard looks something like this:

A radiused sanding block with 400 grade sandpaper is now used to sand the fretboard down. Some of the cowboy-chord finger positions are really worn down, but we will try to get the fretboard as good as possible without having to lower the entire surface by too much. Also, in an attempt to minimise the effect of the back bow, the fretboard is sanded more heavily towards the middle of the neck.

Neck relief (back bow):

Since a lot of lovely rosewood dust is getting spread all over the fretboard, and since, coincidentally, we need to fill in a big long crack, this is a perfect (and very convenient) time to drip superglue along the crack, sealing that dust into the gap. Once the superglue has dried, it is actually easier to remove any excess with a fine file, rather than clogging up the sandpaper. A bit more sanding with the radiused sanding block and we should be done with the fretboard.
The crack before we started sanding:

After a bit of sanding, you can see the crack getting filled with rosewood dust:

Superglue is applied along the length of the crack:

A similar technique was later used on the deepest gouge in the cowboy chord positions of the fretboard.
Now onto the lacquer removal. Since the lacquer is literally flaking off this neck, there is no doubt what the best method is to strip this – with a paint scraper. Here’s a picture of the peghead with the lacquer partially removed. It is very easy to see what has been removed and what hasn’t.

Here’s another picture of part of the back of the neck, also with some lacquer removed. Some areas were easier than others to remove lacquer from, but the outer edge of the peghead was by far the most difficult, especially around the lower edge.

And now here's the face of the peghead after scraping:

The tuners on this guitar have been replaced at least once, and a couple of the tuners have been replaced several times, leaving it with a LOT of holes where there shouldn’t be any. Luckily, most of these will actually be covered by the new tuners, but we would like to fill in these holes anyway, especially since some of them lie very close to where new holes will be and we don’t want any screws to be wandering into the wrong hole.
Screw holes:

Check with new tuners to see what will still be visible:

The quickest and easiest way to do this is by superglueing cocktail sticks into the holes as shown here:

The cocktail sticks are now snipped and filed/sanded down to the same level as the peghead. As mentioned, these will be mostly hidden from view, so no need to worry too much about how well they match the peghead wood.

With the fretboad re-radiused, the lacquer removed and the holes filled, the whole neck is given an all-over sanding. Unfortunately the original logo decal has left a type of sunblock tan line on the peghead, so short of making the new logo an exact fit, this may need to be sanded further. That said, a quick test with a black and white printout of the decal we have made up shows that it is a very close match already.
Old logo "tan line":

Black and white test printout of our new logo:

Similarly, the serial number needs attention. Here is how it looked before the lacquer was scraped off:

And here it is after. It's still there, but hard to see:

Stay tuned for the next post where we will be re-fretting the neck.